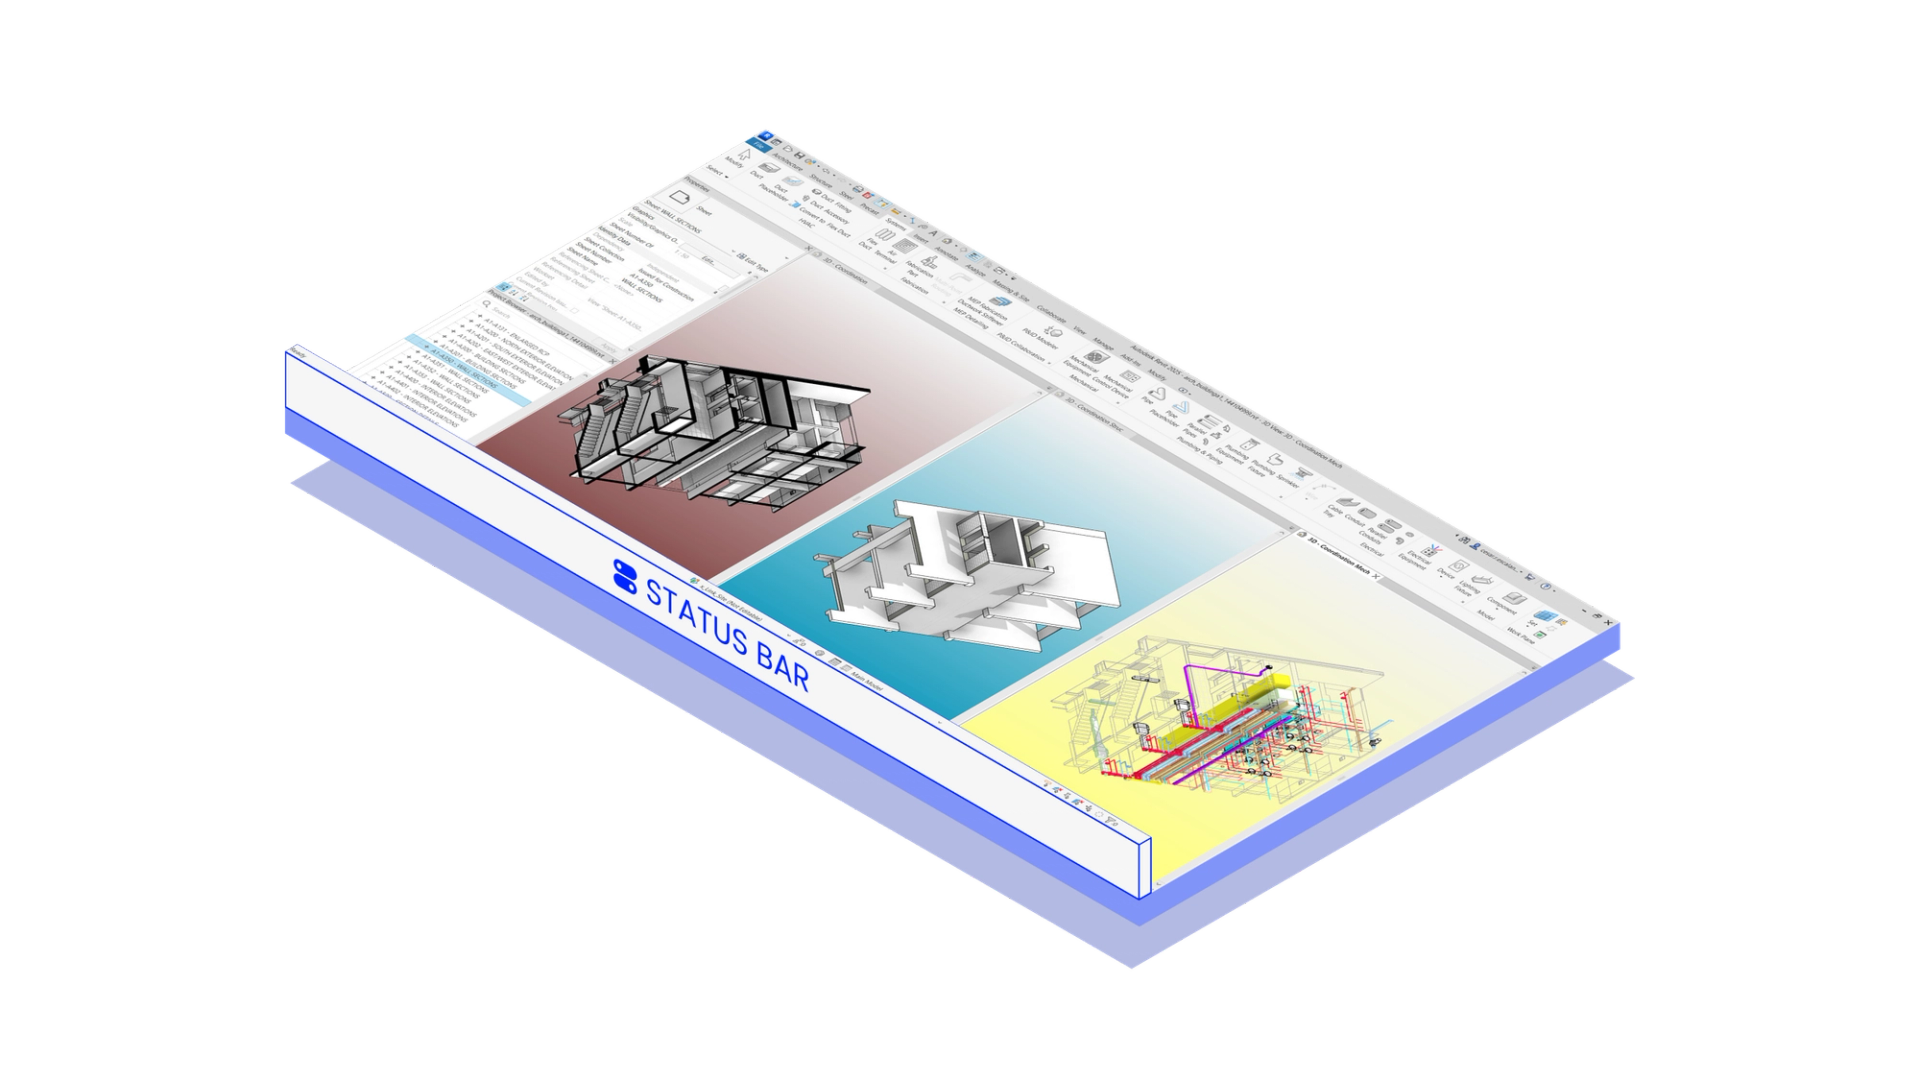
Custom buttons in Revit Status bar
The problem
Some apps need to communicate with the user, or allow interaction in a convenient way that’s always on display. Like a status. And Revit has a built-in Status bar just for that. However, there’s no official way to expand it with our own buttons. Luckily, we like to explore and are always up to the challenge, so we came up with a way to inject custom buttons in a semi-native way.
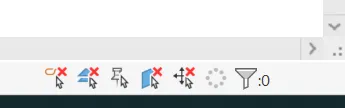
Before:
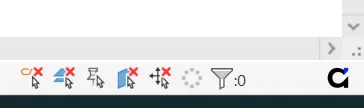
After - notice rearranged Status bar:
TL;DR
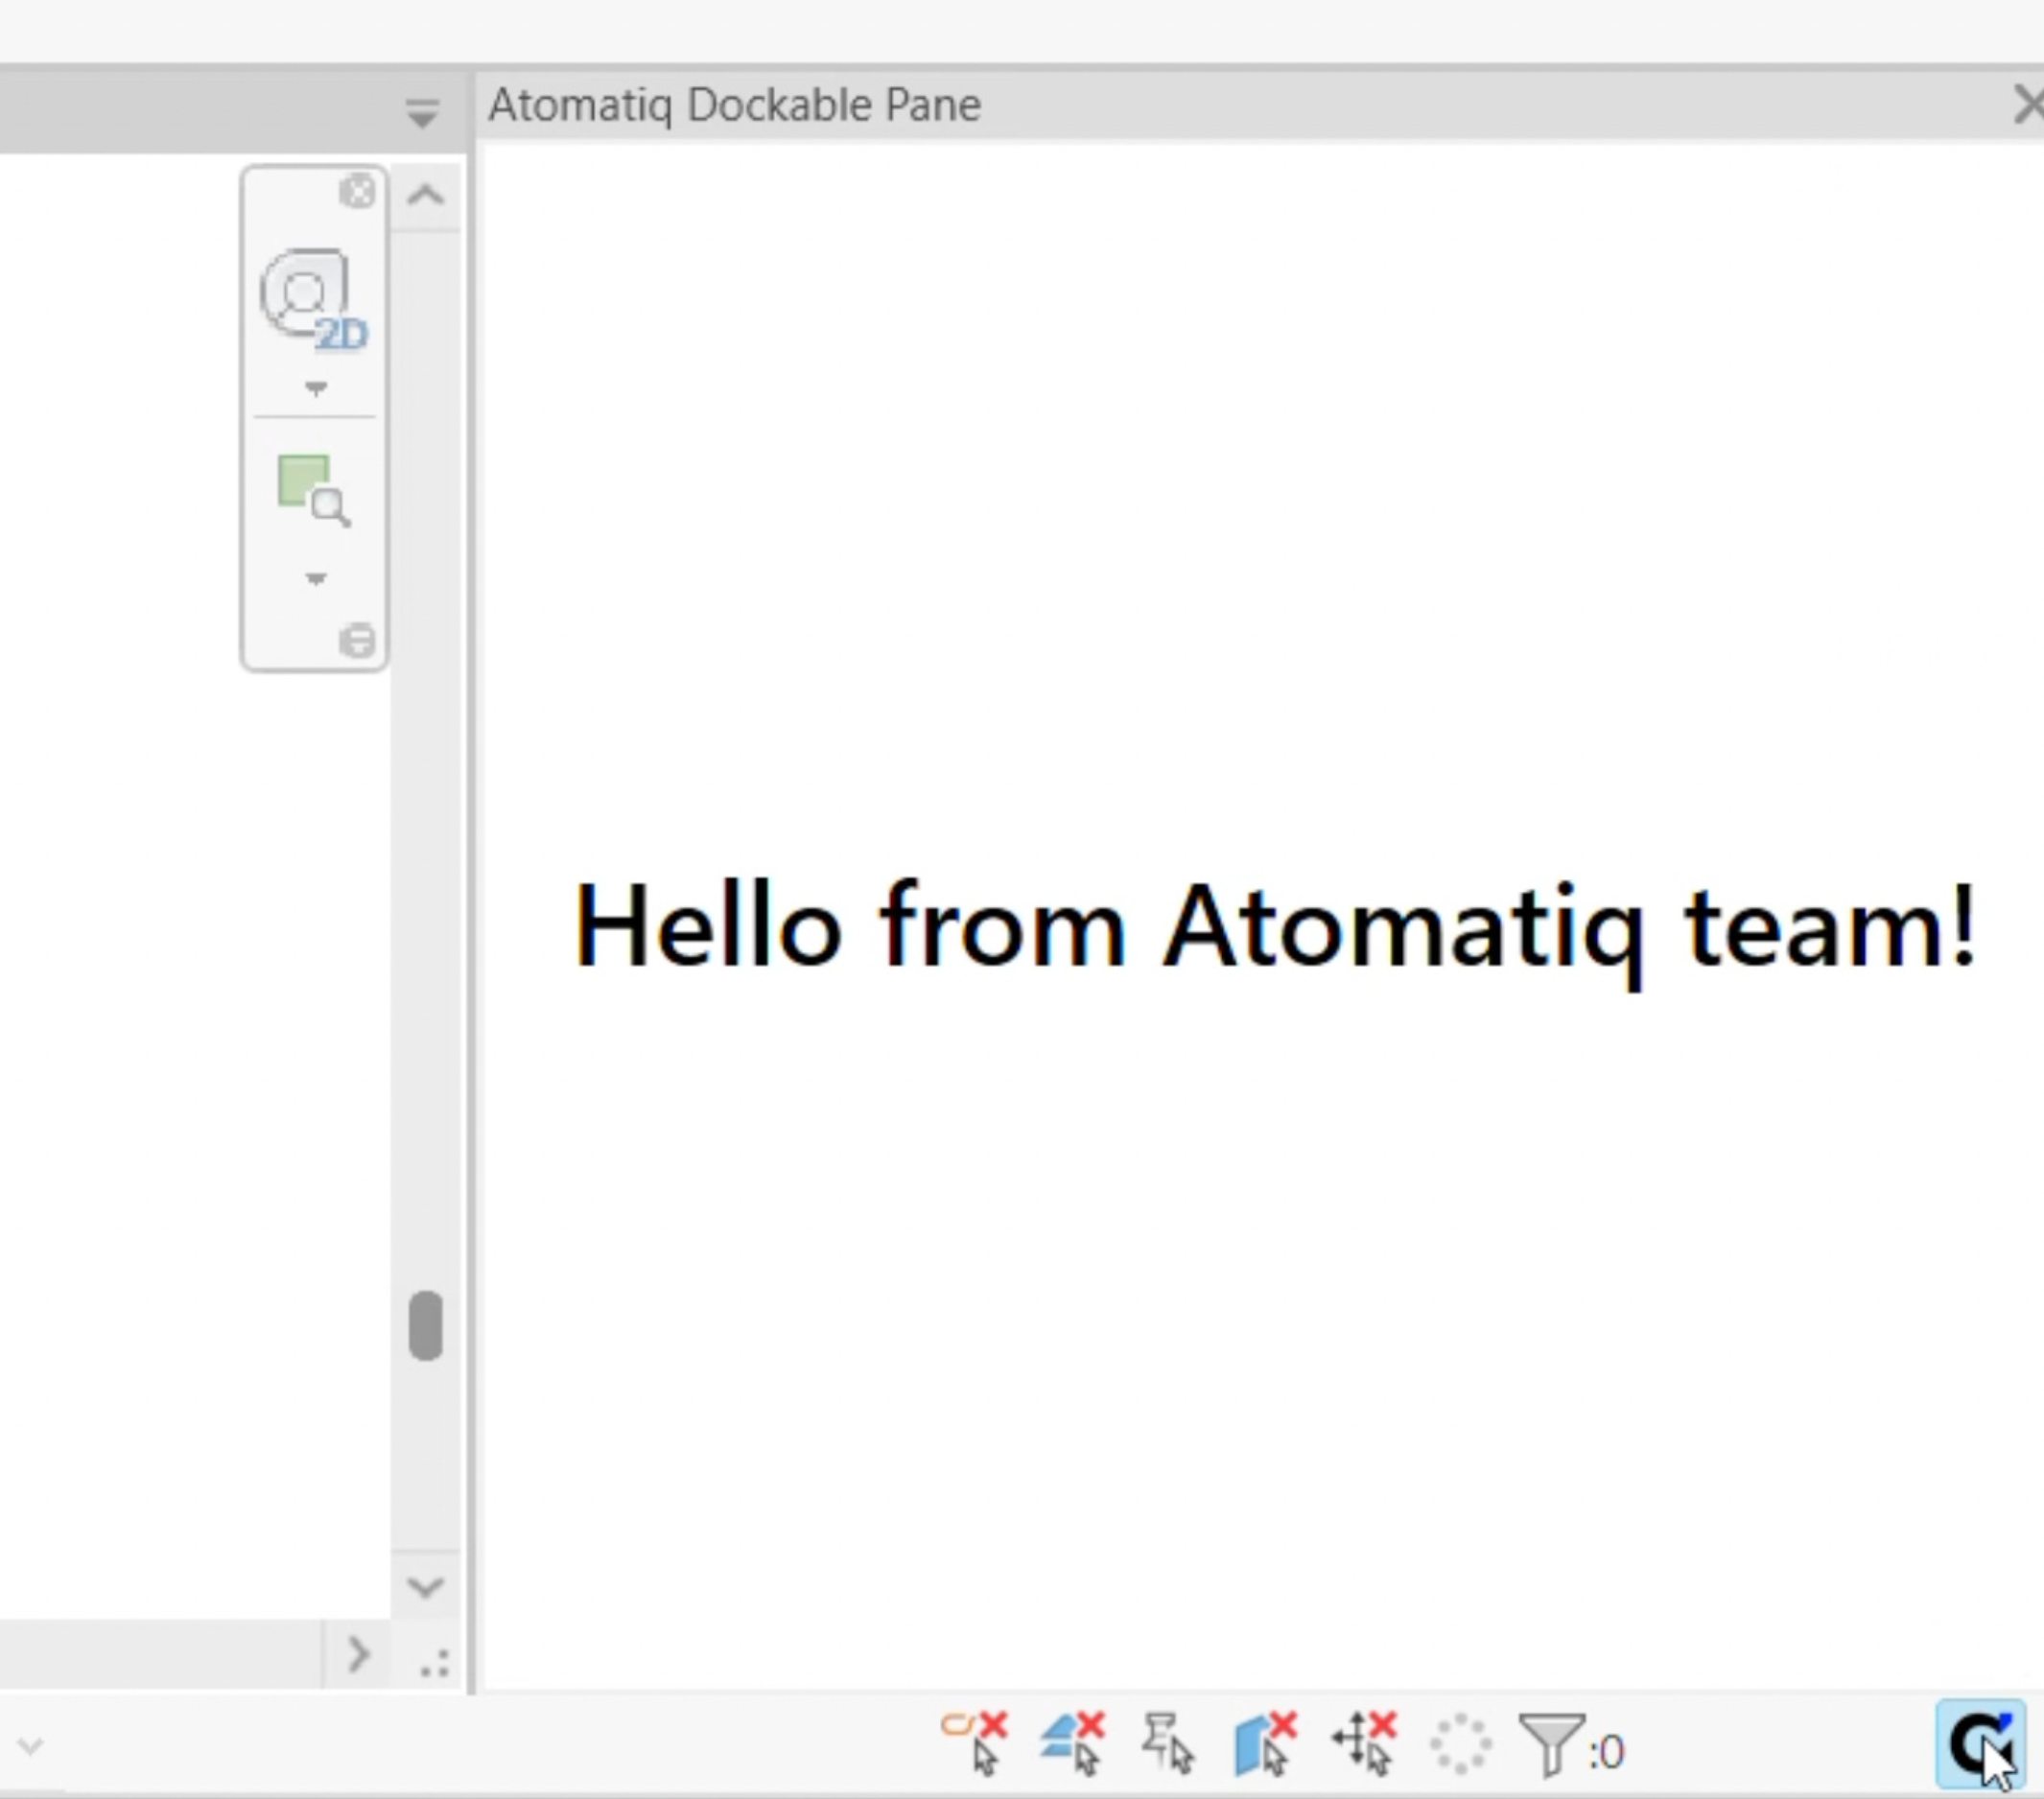
Utilizing lower-level mechanics with the help of Win32 API allows us to rearrange internal layout of Revit’s control and place custom buttons inside it, creating a seamless look and always-on-display availability of external functionality. Buttons can execute any kind of action - for example, open a dockable pane:
ABOut Status bar
Revit UI is built with WPF, which allows us to easily explore its structure using utilities such as Snoop and come up with workarounds for adding our own controls. But when trying to inspect a Status bar, you’ll notice that it’s un-inspectable. That’s why we need a different tool for this: Accessibility Insights for Windows, which allows us to make a deeper UI inspection. It reveals that in fact, it is a standard Win32 control — a StatusBar, which, unlike WPF controls, allows extension and customization, but requires management on a much lower level.
Internally, Status bar is divided into parts, which are represented by their right-edge coordinates. Each part hosts a certain control, which is represented with a separate window.
Solution structure
We’ll keep most of the code flexible and project-independent, and will separate it into three parts:
- High-level manager, unique for each project. It defines specific buttons, their names, icons and tooltips, and raises button-specific events when they are clicked.
- Status bar manager, which registers buttons and communicates with Revit and Windows on any interaction with them.
- Utility classes - constants, resource managers, data models.
This structure allows us to easily utilize this approach in different projects with minimal changes.
about interaction via win32 api
At lower levels, Windows communicates with windows via a message loop on a UI thread. Communication is synchronous and contains simple information on how system or user interacted with our control. We handle the message, send Windows back a reply, and continue the loop.
Sending a message is done by calling a particular method, commonly called a “window procedure” - or, when written in code, wndProc. We can define our own procedures and legally “hijack” them by sending Windows a specific message that contains pointers to a target window and our procedure, saying: “when interacting with this window, please call this method”. This is called subclassing and is done with a few lines:
private void SubclassStatusBar()
{
    _statusBarWndProcDelegate = StatusBarWndProc;
    var wndProcPtr = Marshal.GetFunctionPointerForDelegate(_statusBarWndProcDelegate);
    _originalSbProc = Win32Api.SetWindowLongPtr(_statusBarHwnd, Win32Api.GWLP_WNDPROC, wndProcPtr);
}
Within our own procedure, it’s vital to call the original procedure at some point - that is, passing these messages to Revit, too. This is why, when registering our own procedure, we store the pointer to the original Revit procedure. When cleaning up, we also restore the original procedure, sending Windows a similar message: “use the original pointer when interacting with this window.”
All native Win32 methods are imported in a separate utility class via DLLImport attribute. Methods can be looked up in official Microsoft documentation. This is what partial contents of this class look like:
// method import
[DllImport("user32.dll", EntryPoint = "CallWindowProc")]
public static extern IntPtr CallWindowProc(IntPtr lpPrevWndFunc, IntPtr hWnd, uint uMsg, IntPtr wParam, IntPtr lParam);

// constant declaration
public const uint WM_DRAWITEM = 0x002B;

// structure declaration
[StructLayout(LayoutKind.Sequential)]
public struct POINT
{
    public int x;
    public int y;
}
Registering the buttons
We reset the buttons every time Revit changes the document, or when the user resizes the window: internally, this causes recalculation of the Status bar, which can cause problems to Revit or our buttons. Better safe than sorry, so we recreate our buttons along with the bar. We’ll need to go through a series of actions to integrate the buttons:
- Clean up previous registrations: for safety, we remove previously registered buttons, dispose of any registered hooks and restore default Revit procedures.
- Free up the space: Revit Status bar is tightly packed, but the most space takes up that information panel on the left. We can adjust its size by asking Windows for coordinates of the parts, and moving them to the left just enough to free up space for our buttons.
- Create buttons: within the cleared space, we place new buttons. They are registered as child Win32 windows of a Status bar, and their location is hard-coded. This is what a typical button creation looks like:
var handle = Win32Api.CreateWindowEx(
    0,
    BUTTON_CLASS_NAME,
    config.Name,
    BUTTON_STYLE,
    x,
    y,
    BUTTON_WIDTH,
    BUTTON_HEIGHT,
    _statusBarHwnd,
    (IntPtr)config.Id,
    IntPtr.Zero,
    IntPtr.Zero
);- Wire them up: we tell Windows that if anything affects these buttons, our custom procedure needs to be called.
Responding to Windows messages
For this approach to work, we’ll need to handle several messages that affect the state of our buttons. They are related to mouse actions (movement and clicks), window actions (resizing and moving), and graphics (button redraw). So, what do we need to do when receiving these messages?
- Call for a redraw (WM_DRAWITEM). Windows sends this message when the window is considered invalidated - the system automatically calls it when the window changes its size or position, and we can do it as needed.
- Mouse movements (WM_MOUSEMOVE, WM_MOUSELEAVE) - we use them to make our buttons look “hovered”, usually with a background change.
- Clicks (WM_LBUTTONDOWN, WM_LBUTTONUP) - we consider a button as clicked only after the user lifts up mouse button to avoid accidental clicks. However, we still need to register a button-down event to draw our button as “pressed”.
- Window updates (WM_SIZE, WM_WINDOWPOSCHANGED) - since the buttons are drawn at specified positions, we need to redraw them any time the user moves or resizes the Revit window.
Mimicking the look
Out of the box, Win32 buttons don’t look like those you see in Revit. We’ll need to reverse‑engineer and recreate their look manually. This is done each time Windows calls for redraw (WM_DRAWITEM).
Graphics-wise, a button is composed of multiple elements that we’ll need to measure, color-pick and recreate:
- border — chamfered, not rounded.
- background.
- icon of a specific size.
The button will have three states, each represented with different looks:
- idle — background matches Status bar, border not visible.
- hovered — light blue background, dark blue border.
- pressed — blue background, dark blue border.
Setting the corresponding flags when handling mouse move and click messages allows us to quickly execute the right flow when redrawing the button. A dedicated method handles creation and compositing different shapes, images and paths that end up being passed to the graphical interface for rendering.
Cleanup
Any injection must follow a simple rule: “don’t break the user space”. After we no longer need the buttons, we must ask Windows to destroy them, unhook any added hooks and reset window procedures to their initial state.
what else?
This approach allows us to seamlessly enrich Revit’s functionality with custom buttons and indicators that look and feel like they are part of a standard interface. Native look requires thoughtful approach and consideration of many aspects that are not mentioned in the article - for example, theme change (dark/light) and different styling within different Revit versions.